1207 Gilbert Drive • Box 41163 • Lubbock, Texas 79407 • Tel: 806-834-4567 • Fax: 806-885-2132
© The Institute of Environmental and Human Health (TIEHH) - All Rights Reserved.
TIEHH is a major location for environmental and health sciences research at Texas Tech. The Department of Environmental Toxicology is the academic home for the core faculty at TIEHH as well as graduate students conducting research on the integration of environmental impact assessment of toxic chemicals with human health consequences.


Lori Gibler
Assistant Director For Information Technology
806-834-3453
Work Hours: 8:00am - 5:00pm
email: lori.gibler@ttu.edu
Brad Thomas
IT Support Technician II
Department of Environmental Toxicology
806-834-6168
Work Hours: 8:00am - 5:00pm
email: brad.thomas@ttu.edu
Contact Us

Information Technology

Setup and Connect Your Device to the TTU Wireless and VPN Network
 WINDOWS 11
WINDOWS 101) Make sure that your system time clock and time zone settings are correct.
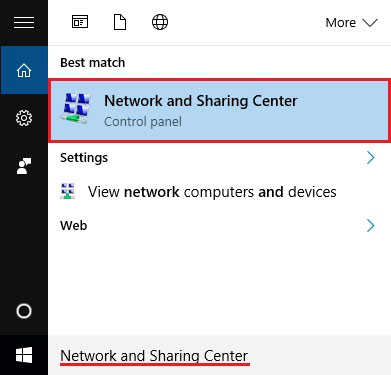
2) Click the Start button in the bottom left-hand corner of your screen and type "Network and Sharing Center". Do not press Enter. When "Network and Sharing Center" appears in the search results, click on it to open it.
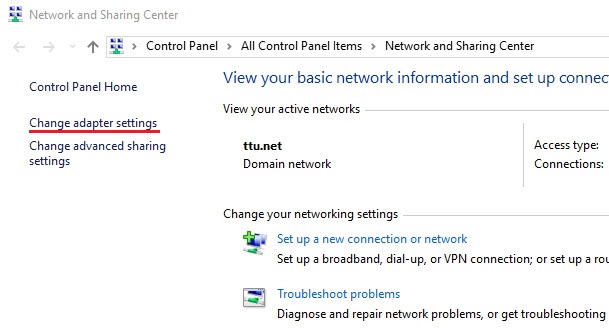
3) Click Change adapter settings on the left-hand side of the window.
4) Right-click "Wi-Fi" and choose Disable.
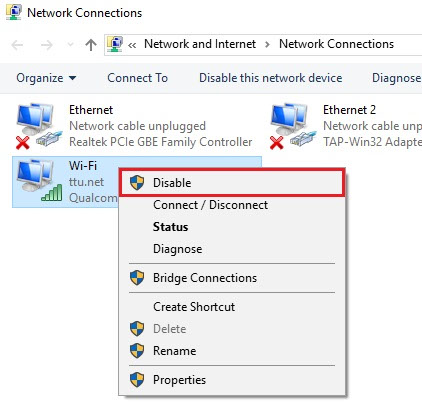
5) Right-click "Wi-Fi" again and choose Enable. Check to see if the issue has been resolved. If not proceed to Step 6 for additional troubleshooting.
TIP: If you connect to TTUnet Wi-Fi in one location and then move locations, your device may attempt to maintain its connection with the wireless access point at the previous location. This can result in a slow connection or the appearance that there is no connection at all. To resolve the problem, simply disable Wi-Fi on your device and enable it again using the steps above. This will cause your device to re-establish a TTUnet connection using the closest access point.

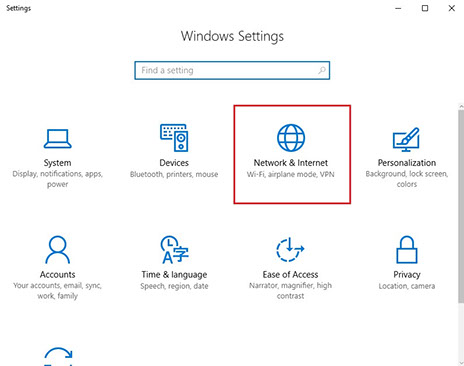
6) Press the Windows key
 + I combination on your keyboard to open your Windows 10 settings. Then, click Network & Internet.
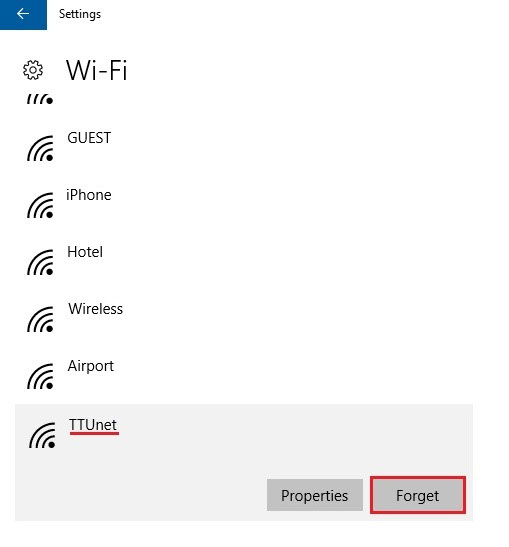
7) Click Wi-Fi in the left-hand pane, and then click Manage known networks under "Wi-Fi".

8) Find the TTUnet Wi-Fi and click on it once to select it. Then, click Forget.
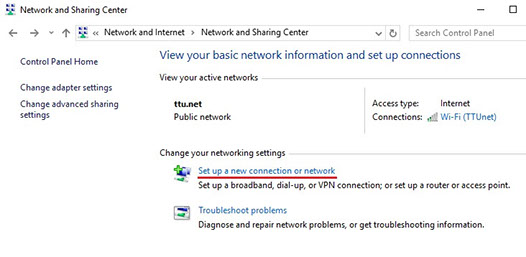
9) Click the Start button in the bottom left-hand corner of your screen and type "Network and Sharing Center". Do not press Enter. When "Network and Sharing Center" appears in the search results, click on it to open it.

10) Click Set up a new connection or network.
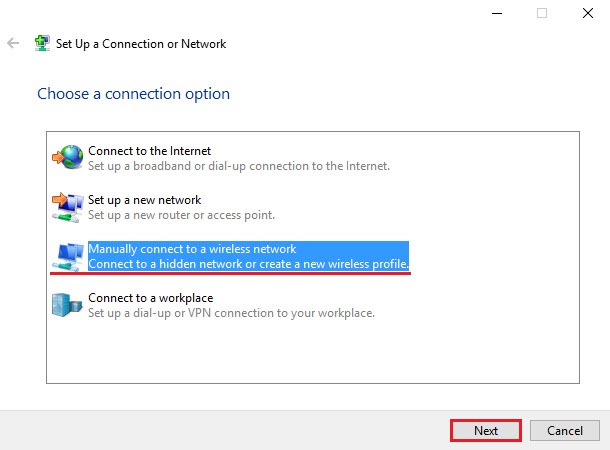
11) Choose Manually connect to a wireless network, and then click Next.
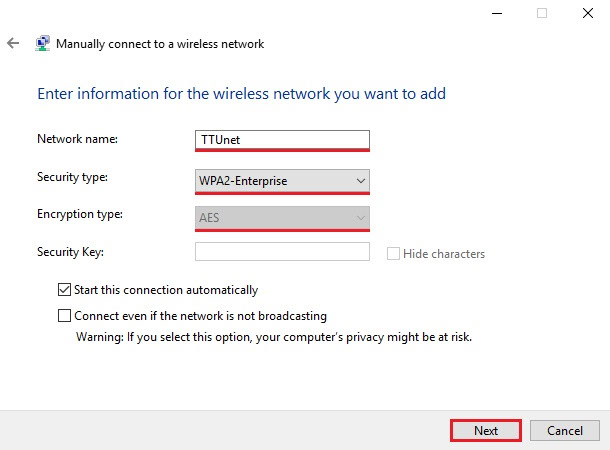
12) Configure the following settings. Then, click Next.
Network name: TTUnet
Security type: WPA-2 Enterprise
Encryption type: AES
13) Click Change connection settings.

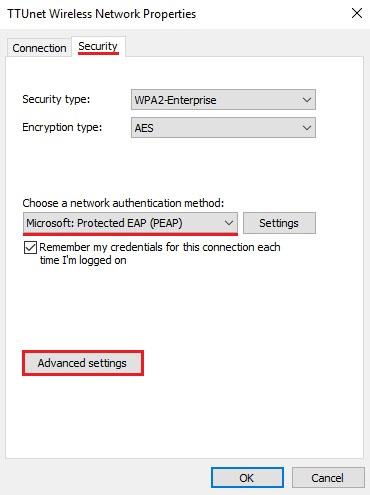
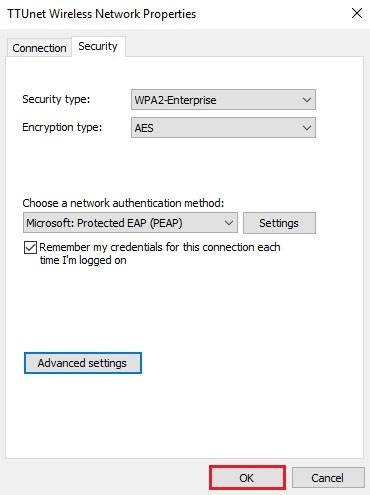
14) Click the Security tab. Ensure that "Choose a network authentication method" is set to Microsoft: Protected EAP (PEAP). Then, click Advanced settings.
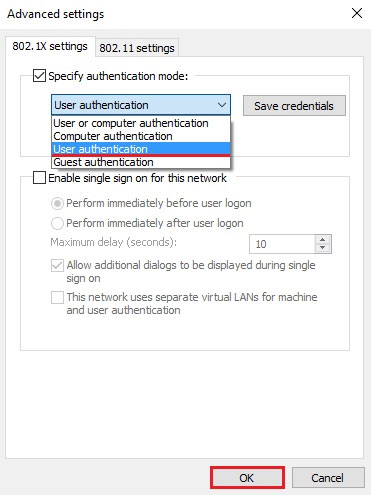
15) Ensure "Specify authentication mode" is set to User authentication. Then, click OK to return to TTUnet Wireless Network Properties.
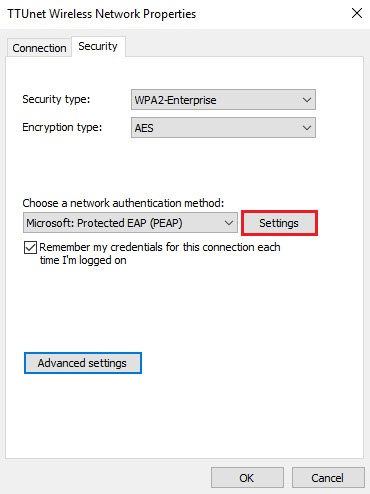
16) Click Settings.
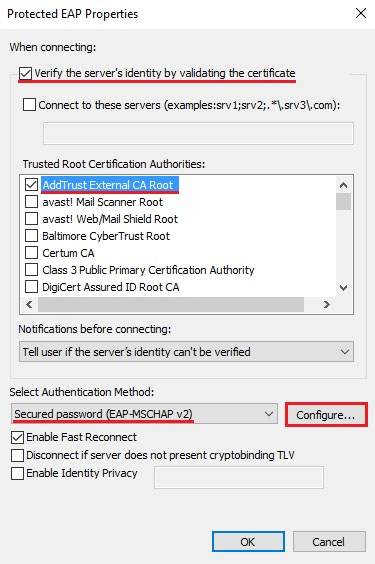
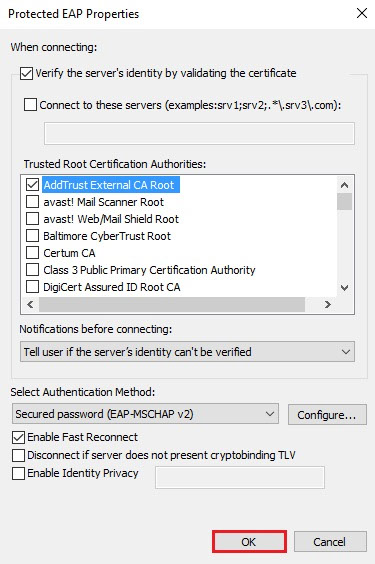
17) Configure the following settings. Then, click Configure.
Verify the server's identity by validating the certificate: Ensure the box is checked.
Trusted Root Certification Authorities: Ensure that "AddTrust External CA Root" is checked
Select Authentication Method: Secured password (EAP-MSCHAP v2)
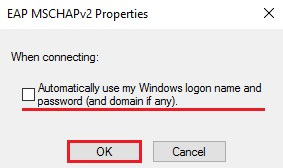
18) Ensure the box for "Automatically use my Windows logon name and password (and domain if any)" is not checked. Then, click OK.
NOTE: If you normally sign in to your computer with your eRaider credentials, leave this box checked.
19) Click OK in the "Protected EAP Properties" window.
20) Click OK again.
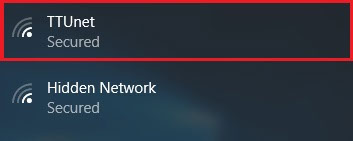
21) On the Windows desktop, click the network icon in the bottom right-hand corner of your screen.

22) Click TTUnet.
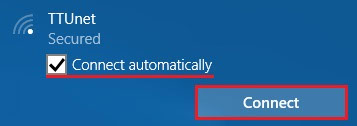
23) Check the box for "Connect automatically", and click Connect.
24) Type your eRaider credentials into the sign-in window, and click OK.
NOTE: Type your username in the format ttu\eRaider_username (e.g. ttu\jdoe).

OUTCOME
Your computer will now connect to the TTUnet Wi-Fi using your eRaider credentials.
MAC OSXIntroduction
In your Mac's menu bar, click the Wi-Fi icon and choose TTUnet. Type your eRaider credentials and click OK. If prompted to verify the certificate, click Continue.
Instructions
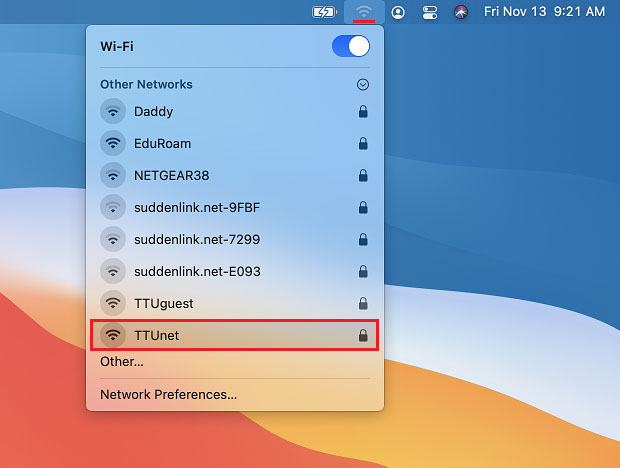
1) In your Mac's menu bar, click the Wi-Fi icon and choose TTUnet.
2) Type your eRaider username and password, and then click OK.
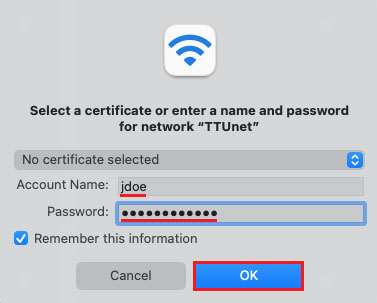
TIP: By default, your eRaider username and password will be saved in your keychain. In order to avoid an account lockout, this information must be updated in Keychain Access each time you change your eRaider password.
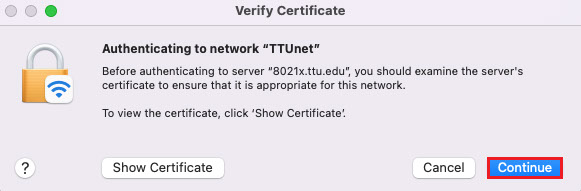
3) If prompted to verify a certificate for 8021x.ttu.edu, click Continue.
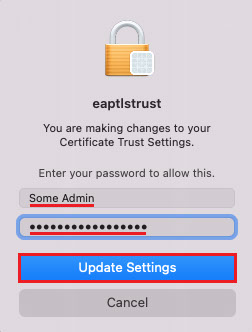
4) If asked for credentials, type the username and password of an account with administrative privileges on your Mac. Then, click Update Settings.
OUTCOME
Your Mac will be connected to the TTUnet wireless network.
APPLE iOSIntroduction
In Settings, tap Wi-Fi. Tap TTUnet. Type your TechMail address as the username and your eRaider password as the password. Then, tap Join.
Instructions
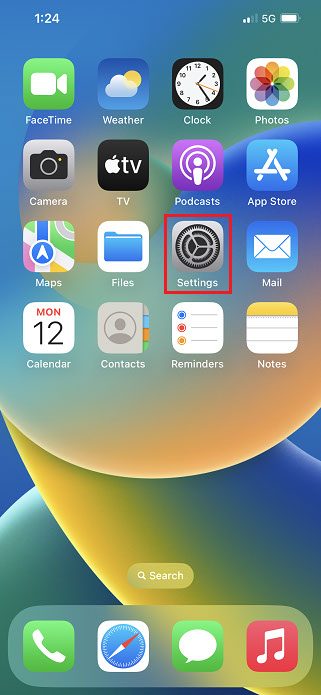
1) Open the Settings app.
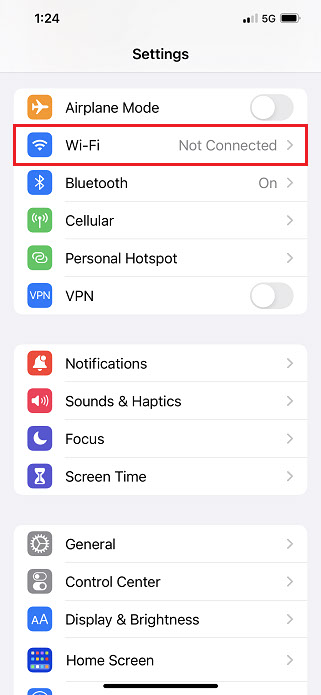
2) Tap Wi-Fi.
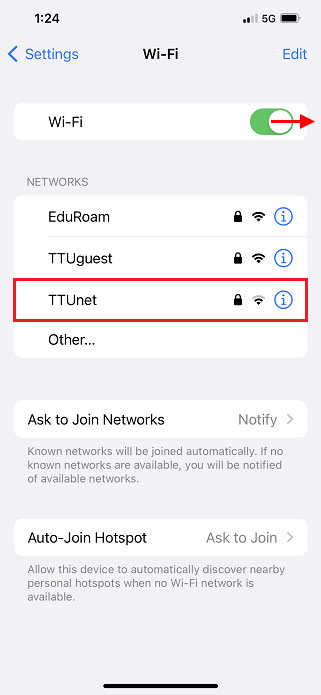
3) Ensure that the Wi-Fi switch is in the "on" position (to the right). Then, tap TTUnet.
4) Type the following information, and then tap Join.
Username: your_TechMail_address (e.g., john.doe@ttu.edu)
Password: your_eRaider_password
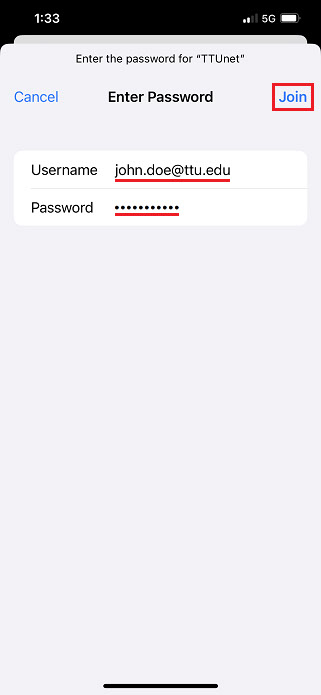
NOTE: If you are unable to join the network using this information, try typing your eRaider username as the username. Or, try putting ttu\ in front of your eRaider username (e.g., ttu\jdoe).
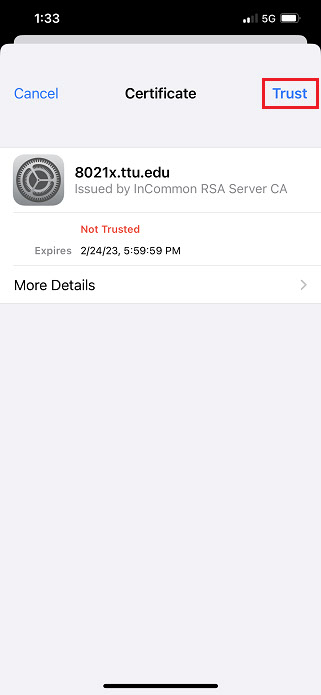
5) If you are prompted to trust a certificate named "8021x.ttu.edu", tap Trust.
OUTCOME
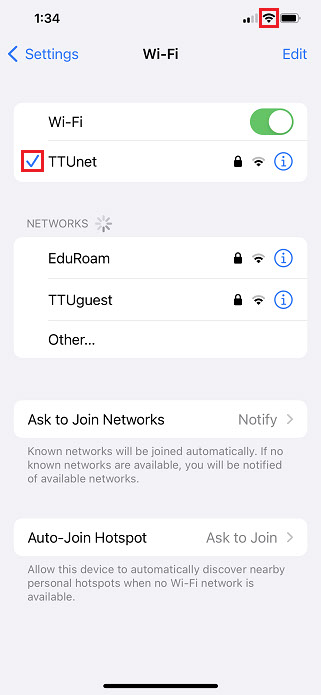
Your iPhone or iPad is connected to the TTUnet wireless network. Once you are connected, you will see the Wi-Fi icon appear in the status bar at the top, and a check mark will appear next to TTUnet in your Wi-Fi screen.
TIP: The next time you change your eRaider password, since it is not possible to update the saved password on your iPhone or iPad, you must go back into your device's Wi-Fi settings and remove TTUnet. Then, set up your device again using the instructions above. Failure to perform these steps may result in account lockouts.
ANDROID 12Instructions
NOTE: Android is highly customizable and may look different depending on your manufacturer. The steps below may vary for different devices.
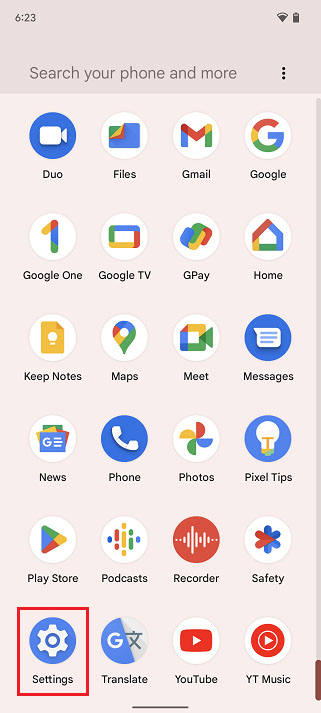
1) Open the Settings app.
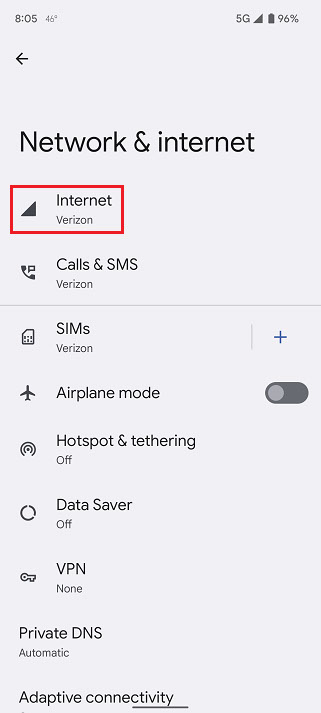
2) Tap Network & internet.

3) Tap Internet.
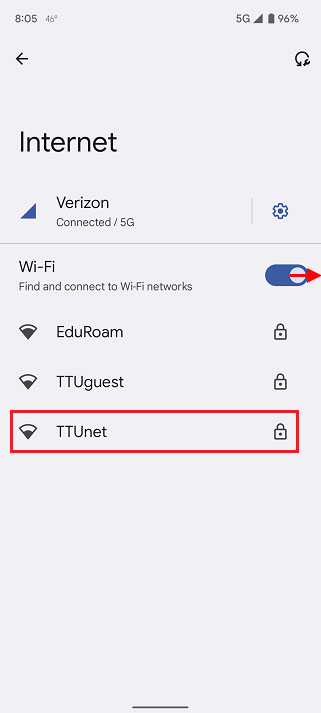
4) Ensure that Wi-Fi is turned on. Then, tap TTUnet.
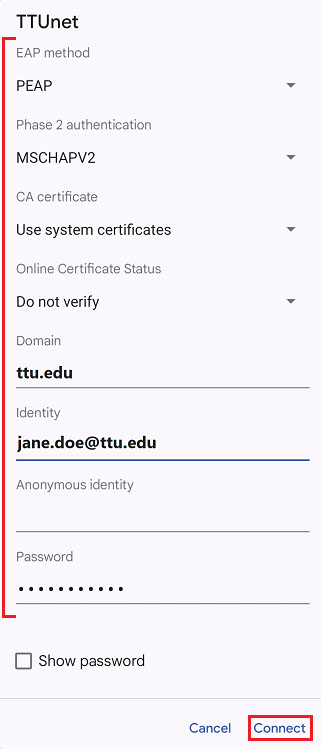
5) Configure the following settings, and then tap Connect.
EAP method: PEAP
Phase 2 authentication: MSCHAPV2
CA certificate: Use system certificates
Online Certificate Status: Do not verify
Domain: ttu.edu
Identity: your_TechMail_address
Anonymous identity: blank
Password: your_eRaider_password
OUTCOME
Your device is connected to the TTUnet wireless network.